
PrestaShop v1.7 Back Office
After installing PrestaShop, enter the randomly generated Back Office URL such as http://www.yourwebsite.com/admin1234abcde in the browser's address bar to access the Back Office. Learn more about PrestaShop and how to install it here.
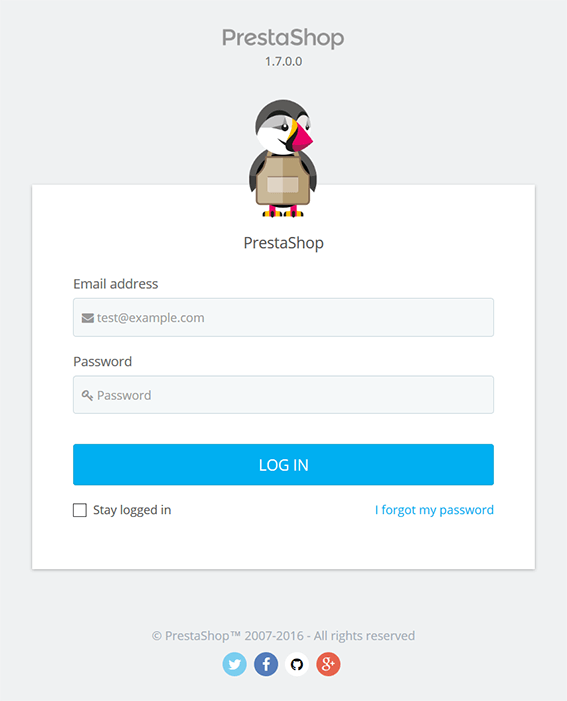
Logging in to the Back Office
If a browser cookie with previous login information is found, PrestaShop will skip the login page and log straight in. In this case, click the account name in the top-right corner and then choose the Sign out link at the bottom of the dropdown to return to the login screen.
Enter the email address and password of the administrator account created during installation or any other account created in the Back Office, tick Stay logged in to save a cookie and then click the Log in button to log in. If the password is forgotten, the I forgot my password link can be used to send a password reset link to the user's email address.
Viewing the Dashboard
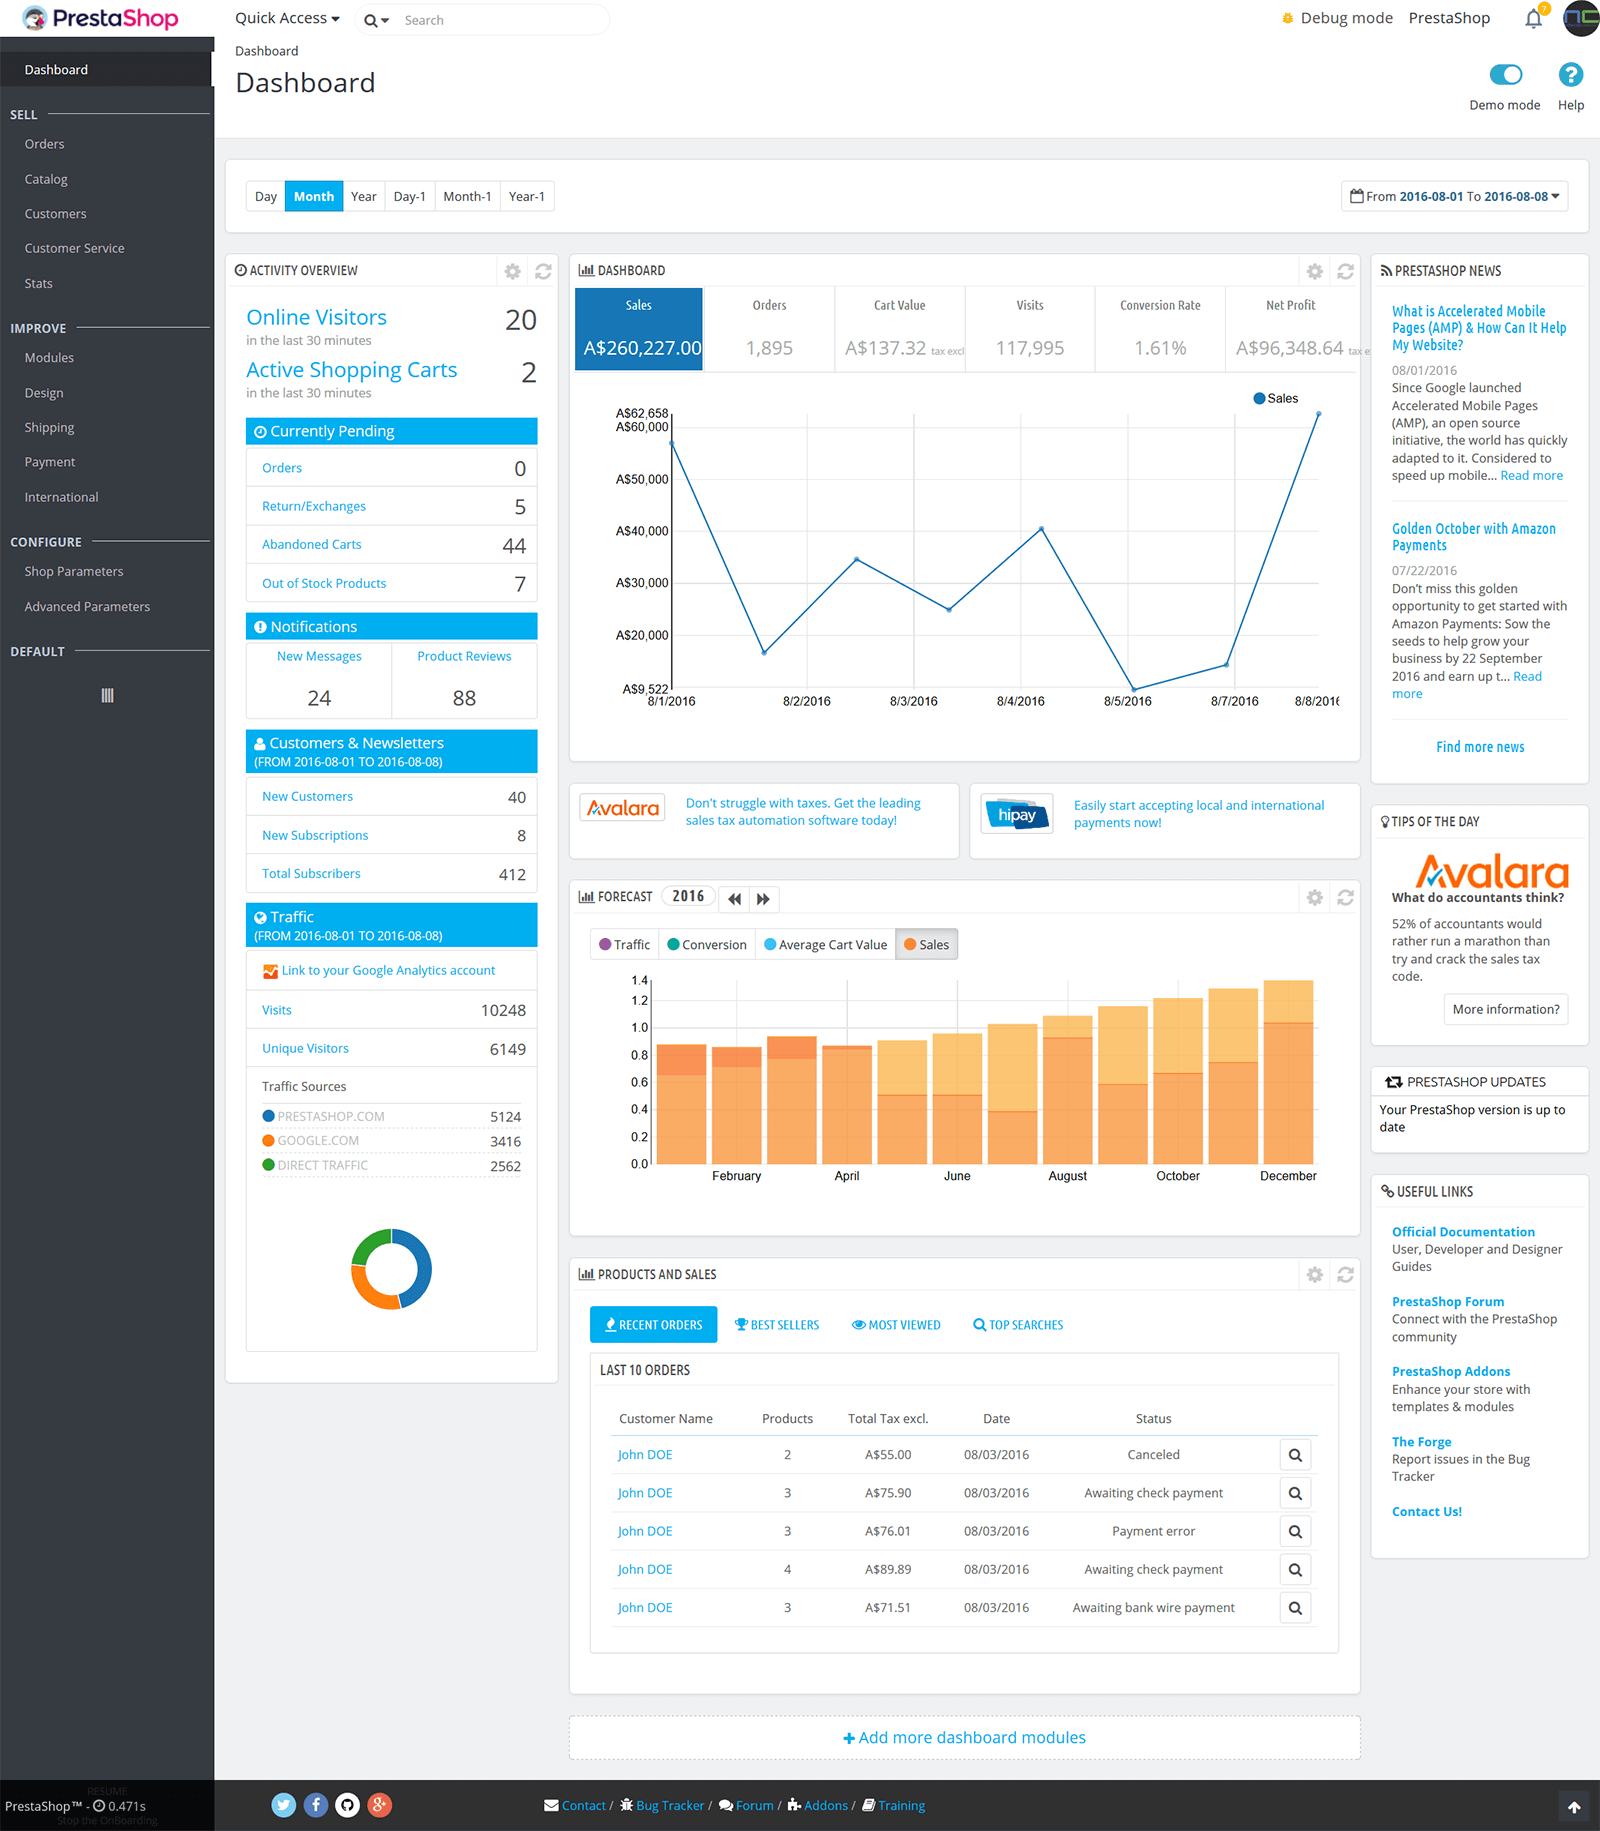
After logging in, the PrestaShop Dashboard will be displayed. By default, the dashboard displays statistics for the last month. There are buttons in the top-left corner to switch between the current day, month or year and the previous day, month or year. The dropdown in the top-right corner can be used to choose a specific date range and compare it to a previous date range.
PrestaShop displays example statistics by default so merchants can try out the dashboard before the website is live. Once the website is live and starting to gather it's own statistics, click the Demo mode button in the top-right corner to switch off demo mode. There is also a Help button that is available on all pages throughout PrestaShop that can be used to view official documentation in a sidebar.
In the left and center columns, there are various blocks of statistics. There is a cog button in the top-right corner of each block to change its settings and a refresh button that can be used to see the latest statistics.
The left column contains an activity overview with the number of online visitors, active shopping carts, pending orders, returns/exchanges, abandoned carts and out-of-stock products, new messages, product reviews, customers and newsletter subscriptions, total subscribers, number of visits and unique visits and traffic sources. There is also a Link to your Google Analytics account link that can be used to install the Google Analytics module.
By default, the number of online visitors and active carts from the last 30 minutes is displayed, but this can be changed on the settings page to 15, 45, 60, 90 or 120 minutes. Carts are considered abandoned if the customer hasn't checked out their products within 24 to 48 hours. This can also be changed on the settings page.
At the top of the center column, there is a Dashboard block with a summary of the sales, orders, cart value, visits, conversion rate and net profit for the specified date range. The settings page allows the average bank fees per payment method, average shipping fees per shipping method, average gross margin percentage and other fees per order used in the calculations.
Below that is a Forecast block that can be configured with traffic, conversion rate and average cart value forecasts for each month. The Product and Sales block displays the latest orders, best-selling products, most-viewed products and searches. By default, 10 of each is displayed, but this can be changed to 5, 20 or 50 on the settings page. There is an Add more dashboard modules link that can be used to purchase additional blocks from the PrestaShop Addons website.
In the right column, there is a PrestaShop News block with links to the latest articles on the PrestaShop blog. Below that is a PrestaShop Updates block with information about whether an update is required. Next is the Useful Links block with links to the official documentation, PrestaShop forums, PrestaShop Addons, The Forge and PrestaShop contact form.
Switching between shops
If Multistore is enabled, a dropdown will be displayed after the PrestaShop logo and version number in the top-left corner. It can be used to switch between changing settings for all shops or just for individual shops.
Checking notifications
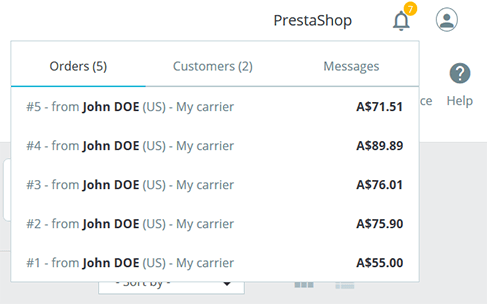
In the top-right corner of PrestaShop is a button with the number of new notifications. Click on this to see a popup with the a summary of new orders, registered customers and messages.
Jumping to quick access
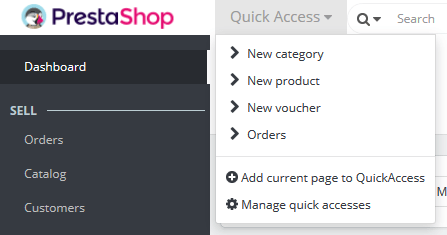
In the top-left corner of PrestaShop to the right of the PrestaShop logo is the Quick Access dropdown, which is a customisable dropdown that can be used to jump from any page to a specific page. By default, it has New category, New product, New voucher and Orders links. Click the Add current page to QuickAccess link to add the current page to the list. To manage existing links, click Manage quick accesses
There is a My Shop link in the top-right corner of PrestaShop that opens the Front Office and a dropdown menu with a My Preferences link that allows the user preferences to be changed. Learn more about user preferences here.
When at the bottom of the page, a footer will fade in. On the left side is the amount of time it took for the page to load, social links to PrestaShop's Twitter, Facebook, GitHub and Google+ page. In the middle, there are links to contact PrestaShop and view the bug tracker, forums, PrestaShop Addons and training courses. On the right side, there is an up arrow button that can be used to scroll back to the top of the page.
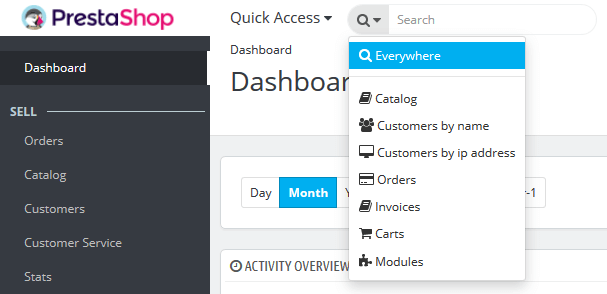
Searching everywhere
After the Quick Access is the search area with a text field and a dropdown on the left. By default, PrestaShop searches everywhere for the search term. This includes products, categories, features, customers, orders, invoices, carts and modules.
Choose Catalog in the dropdown to search only products, categories and features, Customers by name to search customers by name, Customers by ip address to search customers by IP address, Orders to search orders, Invoices to search invoices, Carts to search carts or Modules to search modules.
Navigating tabs
There is a menu on the left side with a link to the Dashboard and another 12 menu items separated into SELL, IMPROVE and CONFIGURE sections. Hovering over a menu item displays a submenu with more items. Clicking on the main menu item navigates to the first item on the submenu.
Learn more about the different sections using the links below:
SELL
Orders
Catalog
Customers
Customer Service
Stats
IMPROVE
Modules
Design
Shipping
Payment
International
CONFIGURE