cPanel File Manager
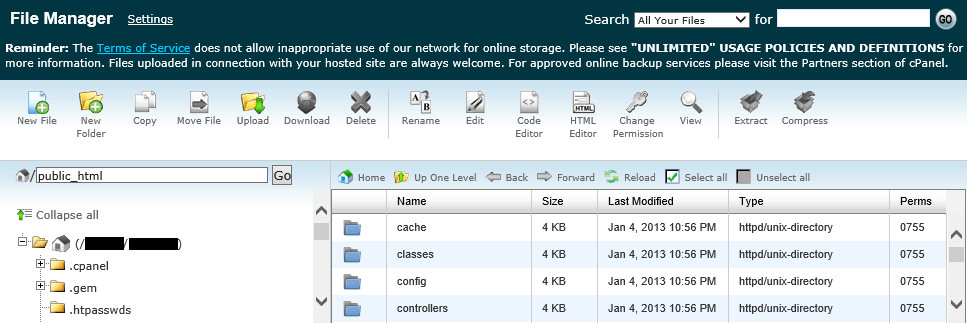
To access the File Manager, log in to cPanel, scroll down to the Files section and then click the File Manager button. Click the Go button on the dialog that appears to open the File Manager in the root directory of the server. Learn more about cPanel including how to log in here.
File Manager has a big toolbar at the top and two columns with a list of folders on the left side and the contents of the current folder on the right side. Click the + button on the left side of a folder icon to expand its subfolders. Click the – button to collapse subfolders. Click the Collapse All button at the top to collapse all subfolders.
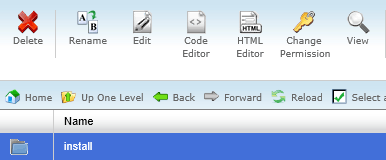
The right column has a smaller toolbar at the top. The Home button switches the view to the Home folder, the Up One Level button opens the parent folder, the Back button goes to the previous view, the Forward button goes to the next view after going back, the Reload button refreshes the view, the Select All button selects all the items in the view and the Unselect All button deselects all the items.
It is also possible to sort files by a specific column by clicking the header at the top of the column. For example, click the Size column header to sort files by size ascending. Click the Size column header again to sort by size descending.
Searching files
In the top-right corner of File Manager is a search text field and dropdown to choose where to search. By default, files in all folders are searched. There are also options to search only the current folder or only the public_html directory. Enter a filename such as "php.ini" and then click the Go button or press the Enter key to perform the search. A dialog will then be displayed with search results.

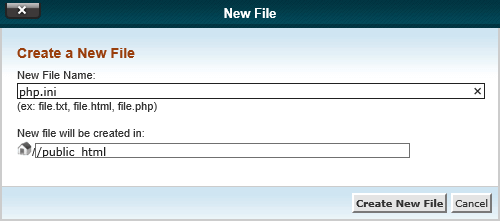
Creating a new file
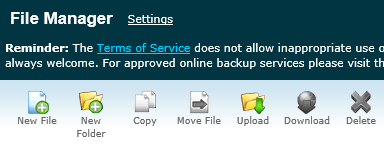
To create a new file, click the New File button on the big toolbar. The New File dialog will then be displayed. Enter a name for the file such as "php.ini" and then click the Create New File button.
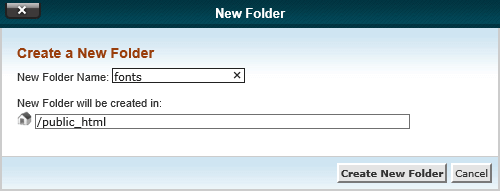
Creating a new folder
To create a new folder, click the New Folder button on the big toolbar. The New Folder dialog will then be displayed. Enter a name for the folder such as "fonts" and then click the Create New Folder button.
Selecting files
To select a file, click anywhere on its row in the right column. To select a range of files, click on the first file’s row, hold the Shift key and then click the last file’s row. To select multiple individual rows, hold the Ctrl key and then click each file’s row.
To select all files, click the Select All button in the small toolbar at the top of the right column. To deselect all files, click the Unselect All button in the small toolbar.
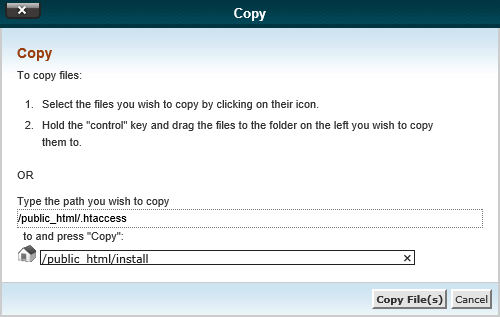
Copying a file
To copy a file, select it in the right column and then click the Copy button on the big toolbar. The Copy dialog will then be displayed. Enter the destination folder name in the text field at the bottom and then click the Copy File(s) button.
Alternatively, select one or more files in the right column, hold the Ctrl key and then drag the files onto the destination folder in the left column.
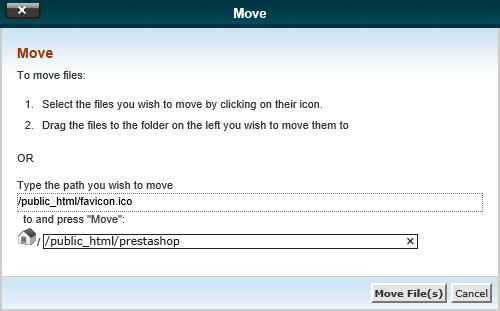
Moving a file
To move a file, select it in the right column and then click the Move File button on the big toolbar. The Move dialog will then be displayed. Enter the destination folder name in the text field at the bottom and then click the Move File(s) button.
Alternatively, select one or more files in the right column and then drag the files onto the destination folder in the left column.
Uploading a file
Click the Upload button on the big toolbar to open the Upload dialog.
Click the Browse button and then select the file to upload. A progress bar will then appear in the bottom-right corner of the browser.
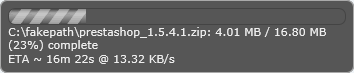
Once the file has finished uploading, close the Upload dialog to return to the File Manager. Click the Reload button on the small toolbar to refresh the files. The uploaded file should then be listed.
Downloading a file
To download a file, select the file in the right column and then click the Download button in the big toolbar. The browser should then display a dialog that can be used to open or save the file.
Deleting a file or folder
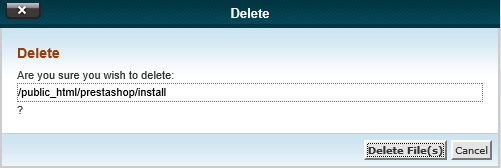
To delete a file or folder, select it in the right column and then click the Delete button on the big toolbar. Alternatively, right-click on the file or folder and choose the Delete menu item. A quicker way to delete is to press the Delete key.
A confirmation dialog will then be displayed. Click the Delete File(s) button to delete the file or folder.
Renaming a file or folder
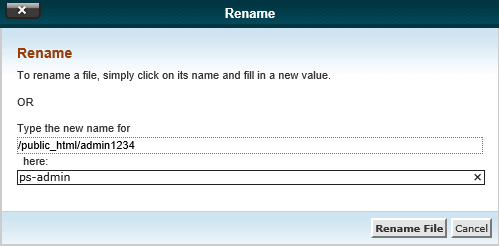
To rename a file or folder, select it in the right column and then click the Rename button on the big toolbar. The Rename dialog will then be displayed. Enter the new name for the file or folder in the text field at the bottom and then click the Rename File button.
Viewing a file
To view a file, select it in the right column and then click the View button on the big toolbar. The contents of the file will then be displayed in a new tab. Click the X on the right side of the grey bar to close the file.
Editing a file
There are a few different tools that are designed to edit plain text, script code and HTML code.
Editing a text file
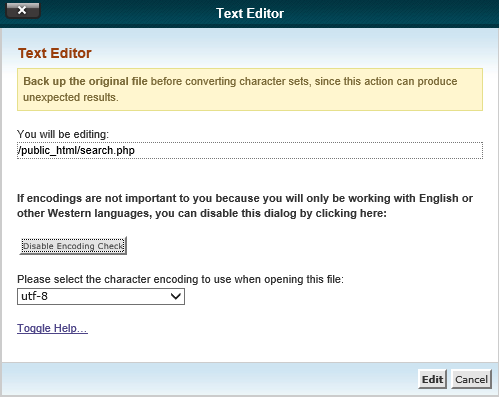
To edit a text file, select it in the right column and then click the Edit button on the big toolbar. By default, an encoding check will be performed and a dialog will display with an option to choose the encoding of the file. It is important to select the right encoding for the file, since converting a file from one encoding to another can cause some characters to display incorrectly.
If the encoding isn’t important, since only English or other Western languages are used, the Disable Encoding Check button can be used to prevent the dialog displaying in the future. Click the Edit button to open the content of the file in a new tab. Edit the text and then click the Save Changes button in the top-right corner to save the changes or click the Close button to undo the changes.
Editing a script file
To edit a script file, select it in the right column and then click the Code Editor button in the big toolbar. After selecting the encoding, the script code will display in a new tab with line numbers and code highlighting.
There is also a toolbar at the top with various options including undo, redo, font size and word wrap. Edit the code and then click the Save Changes button in the top-right corner to save the changes or click the Close button to undo the changes.
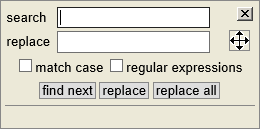
Searching and replacing text
Click the binoculars icon in the toolbar to open the Search dialog. Enter the text to search for in the Search text field. If the text should be replaced with some other text, enter it in the Replace text field.
By default, the search is case-insensitive, so text will match whether it is uppercase or lowercase. Tick the Match Case checkbox to only match text that has the same case as the search text. To perform an advanced search, enter a regular expression in the Search text field and then tick the Regular Expressions checkbox.
Click the Find Next button to highlight the next instance of the search text. Click the Replace button to replace that instance with the replacement text. Click the Replace All button to replace all instances of the search text with the replacement text.
If the Search dialog is covering text that needs to be read, move the mouse cursor over the crossed arrows icon and then click and drag the dialog out of the way. Click the X icon in the top-right corner of the dialog to cancel the search.
Jumping to a line number
To jump to a line number, click the right arrow icon on the toolbar. The browser will then display a prompt that asks for the line number. Enter the line number and then click the OK button to jump to that line.
Changing the script language
By default, the file extension will be used to determine how the code will be highlighted. The second dropdown on the toolbar can be used to change the highlight language. Supported languages include Basic, C, ColdFusion, C++, CSS, HTML, Java, JavaScript, Pascal, Perl, PHP, Python, Ruby, robots.txt, SQL, T-SQL, Visual Basic and XML.
Editing an HTML file
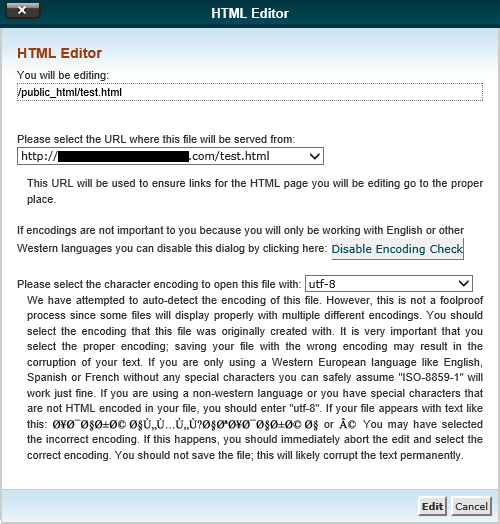
To edit an HTML file, select it in the right column and then click the HTML Editor button on the big toolbar. The HTML Editor dialog will then appear. Choose the URL where the file will be served from so that the editor can generate correct URLs, choose the file encoding and then click the Edit button.
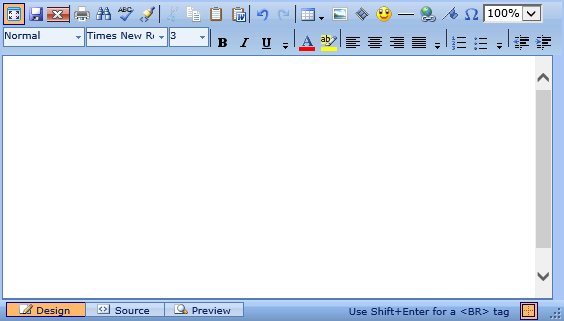
The content of the HTML file will then be opened in a new tab along with toolbars to edit the code. By default, the file will open in Design view, which allows the HTML file to be edited visually without seeing the code. The toolbars have standard formatting options and buttons to insert tables, images, videos, emoticons, horizontal lines, links, bookmarks and symbols.
The HTML editor also has zoom, spellcheck, search and replace, print and code cleanup options. To view and edit the source code, click the Source button at the bottom to switch to Source view. Click the Preview button at the bottom to see a preview of how the HTML file will render in the browser. When finished, click the Save icon in the top-left corner to save changes or click the Cancel button next to it to undo changes.
Changing file and folder permissions
To change the permissions or one or more files or folders, select them in the right column and then click the Change Permissions button on the big toolbar. The Change Permissions dialog will then be displayed with nine checkboxes that can be used to choose user, group and world read, write and execute permissions.
There are also three text fields at the bottom that allow a number to be used to set the user, group and world permissions. In most cases, folders should be chmod 755 and files should be chmod 644. Click the Change Permissions button to save changes or the Cancel button to undo changes.

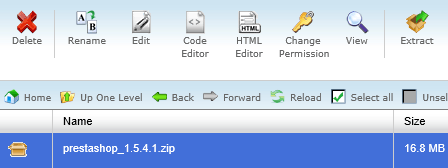
Extracting a file
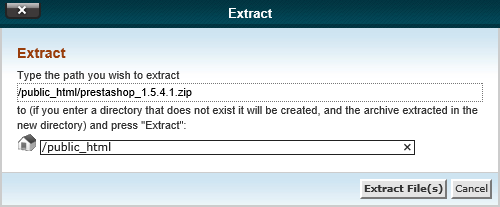
Click on a ZIP file to select it and then click the Extract button on the big toolbar to display the Extract dialog.
Click on the Extract File(s) button to extract the contents of the ZIP file to the current directory.
After extraction completes, click the ZIP file to select it and then click the Delete button on the big toolbar to delete it, since it is no longer required.
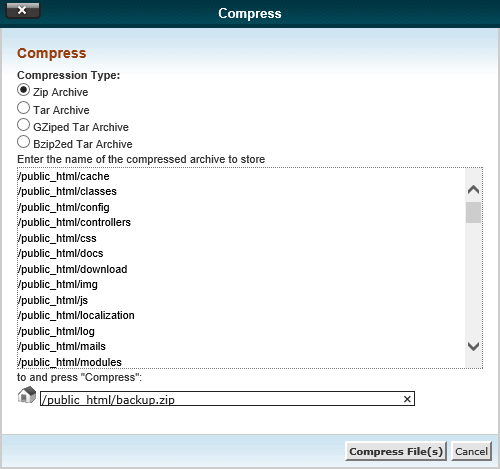
Compressing files
If the host account doesn’t come with a file backup option, a backup can be made by compressing all the files and then downloading the archive. To do this, click the Select All button on the small toolbar at the top of the right column and then click the Compress button on the big toolbar.
The Compress dialog will then display. Click the radio button to the left of Zip Archive to create a ZIP file, the most popular of the formats. Enter a filename such as "backup.zip" in the text field at the bottom and then click the Compress File(s) button.
After compression completes, click the "backup.zip" row and then click the Download button on the big toolbar to download the backup. After download completes, click the Delete button on the big toolbar to delete the backup, since it is no longer required.