There are a couple of ways to download PrestaShop and upload it to a server. Some hosts offer scripts that automatically download and install the latest version of PrestaShop. If such a tool is unavailable, PrestaShop will need to be manually uploaded to the server.
Installing on a remote server
Download the latest PrestaShop v1.7 stable archive from the PrestaShop download page here, extract the zip file to your computer, and then upload index.php and prestashop.zip to the root directory on your remote server using an FTP client such as FileZilla.
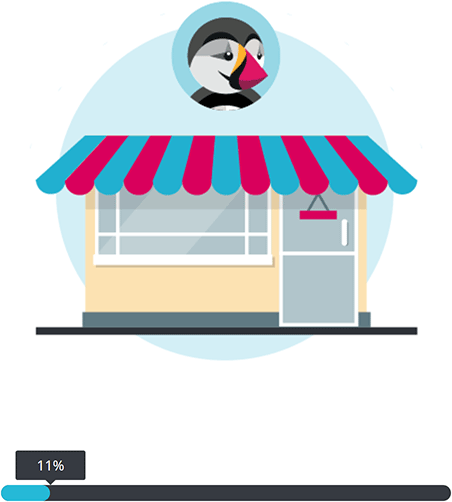
When the upload completes, go to http://www.yourdomain.com/ in your web browser to begin the installation process. You will then see an animation of a store opening and Preston the Puffin winking, along with a progress bar to indicate how much of PrestaShop has been extracted (see Figure 1).
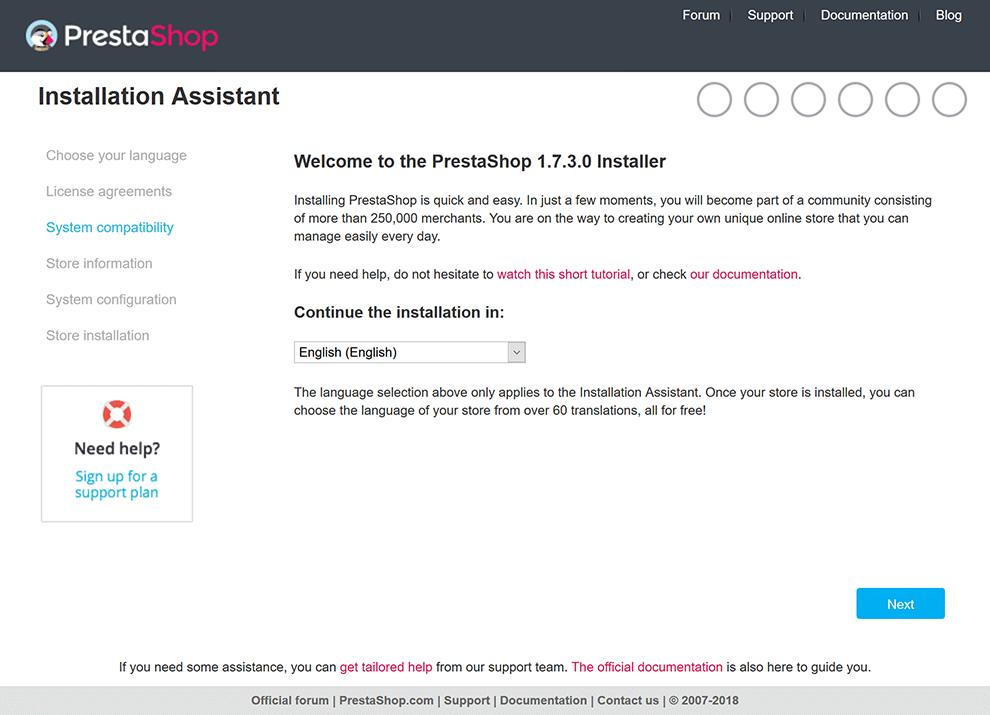
Once all the PrestaShop files have been extracted on the remote server, the PrestaShop installer will appear. By default, the PrestaShop Installer is displayed in English.
Choosing the PrestaShop installer language
In the Choose your language step of the installer (see Figure 2), there are options to switch the installer to many other languages. Changing the installer language will not affect the languages of the PrestaShop store. The store languages are configured after installation. Select the language to continue the installation in and then click the Next button to continue to the next step.
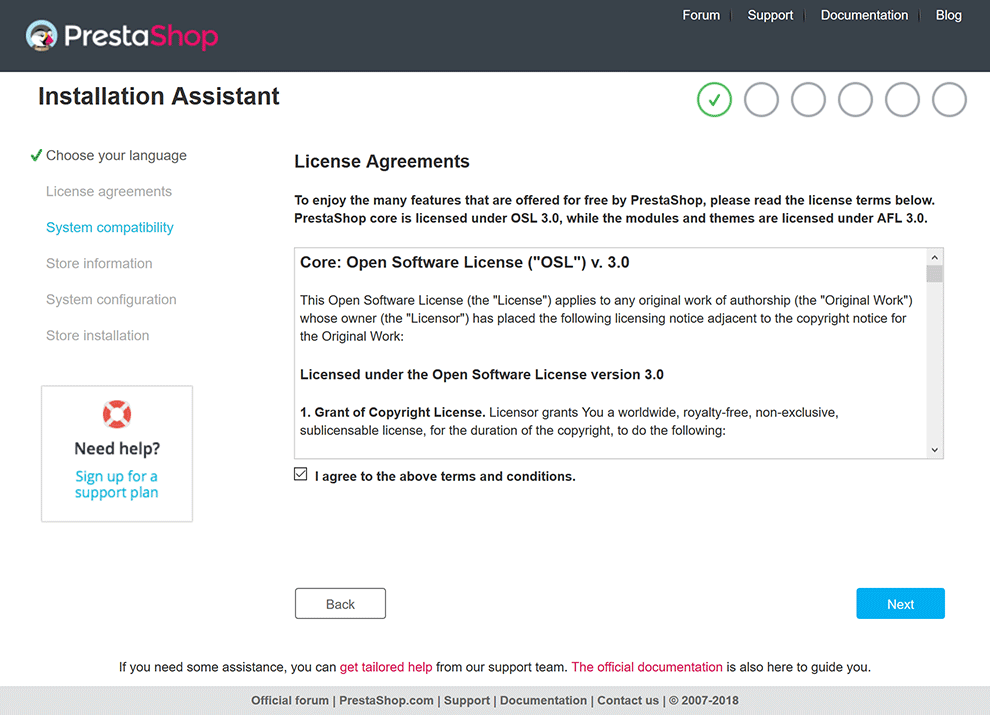
1.2 Accepting the license agreements
In the License agreements step of the installer (see Figure 3), the license agreements are displayed. The core of PrestaShop is licensed under OSL 3.0 and the modules and themes are licensed under AFL 3.0. Tick the I agree to the above terms and conditions checkbox and then click the Next button to continue.
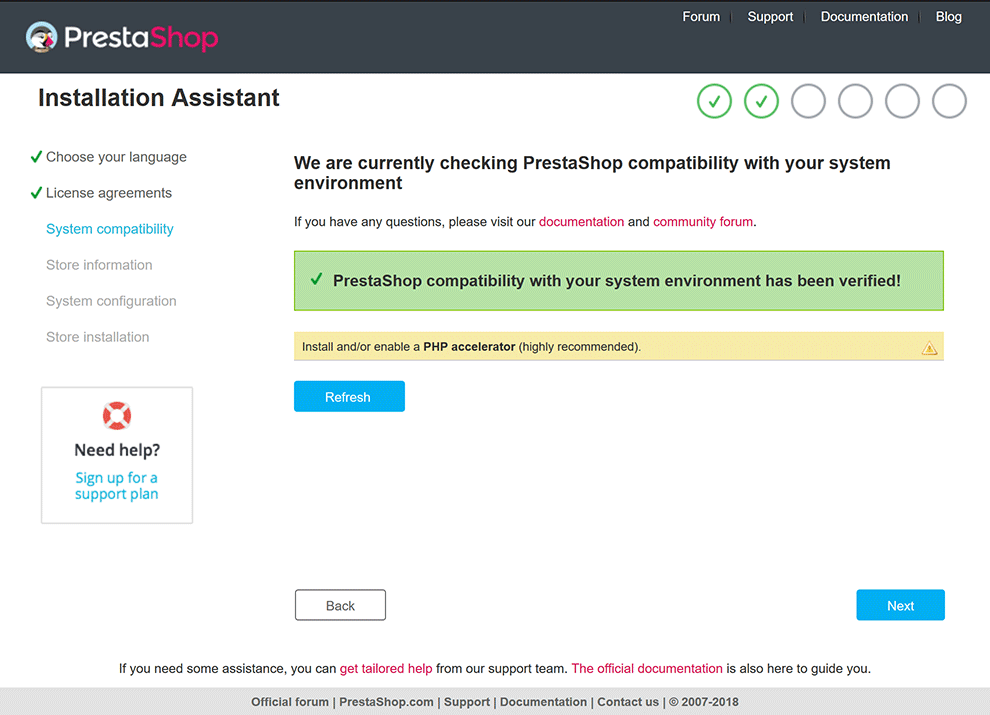
Checking server configuration
The System Compatibility step of the PrestaShop installer (see Figure 4), the PHP configuration is checked to ensure it is compatible with PrestaShop. Depending on your PHP configuration, various errors may appear here, though they are easy to fix by editing your php.ini file. See the table below for how to fix each issue. If your server uses Windows, use .dll for the extensions. If your server uses Linux, use .so for the extensions.
| Required PHP parameters | |
| Cannot upload files | Check account has permission to upload files |
| Cannot create new files and folders | Check account has permission to create files and folders |
| GD Library is not installed | Add extension = php_gd2.dll or extension = gd2.so to php.ini |
| PDO MySQL extension is not loaded | Uncoment or add extension = php_pdo_mysql.dll or extension = pdo.so and extension = pdo_mysql.so to php.ini |
| PHP 5.4 or later is not enabled | Log in to cPanel and go to PHP Config to change PHP version |
| ZIP compression is not activated | Add extension = php_zip.dll or extension = zip.so to php.ini |
| Required Apache configuration | |
| Enable the Apache mod_rewrite module | Add LoadModule rewrite_module modules/mod_rewrite.dll or LoadModule rewrite_module modules/mod_rewrite.so to httpd.conf |
| Files | |
| Not all files were successfully uploaded on your server | Check to make sure all files were uploaded correctly |
| Recommended PHP parameters | |
| Cannot open external URLs | Add allow_url_fopen = On to php.ini |
| Dom extension is not loaded | Install php-xml and restart the server |
| GZIP compression is not activated | Add zlib.output_compression = On and zlib.output_compression = 6 to php.ini |
| Mbstring extension is not enabled | Add extension = php_mbstring.dll or extension = mbstring.so to php.ini |
| Mcrypt extension is not enabled | Add extension = mcrypt.dll or extension = mcrypt.so to php.ini |
There may also be warning messages related to write permissions. If so, use an FTP client such as FileZilla to recursively set the permissions to chmod 755 for directories and chmod 644 for files.
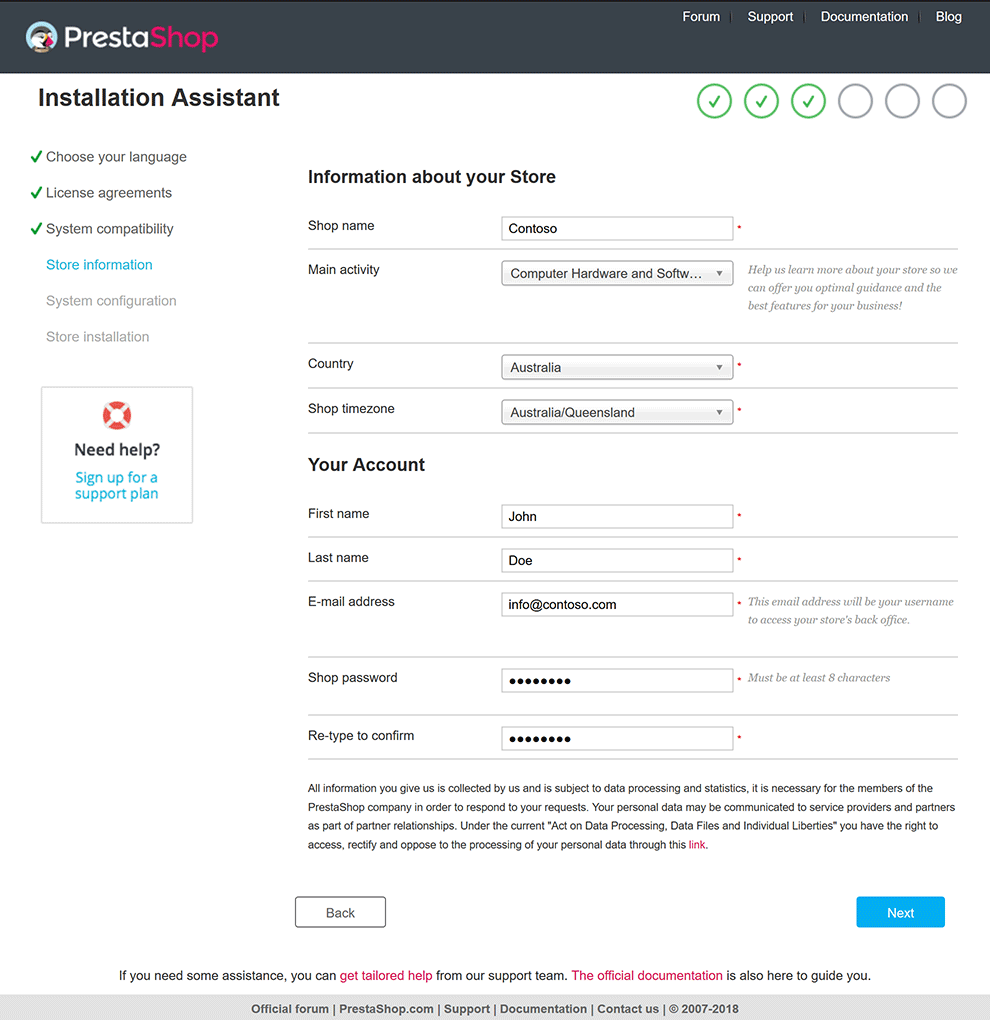
Configuring store information
In the Store information step of the installer (see Figure 5), enter the shop name and then choose the default country and timezone. Optionally, choose the main activity of the shop, which is used for statistical purposes. By default, PrestaShop installs demo products and orders to make it easier to see PrestaShop''s features in action. Change Install demo products to No to have a clean installation without demo products.
In the Your Account section, enter the name, email address and password for the administration account that will be used to log in to PrestaShop and change settings. The password must be an alphanumeric string with at least 8 characters and must be entered twice to confirm it has been typed correctly.
After entering all the required information, click the Next button to continue to the next step.
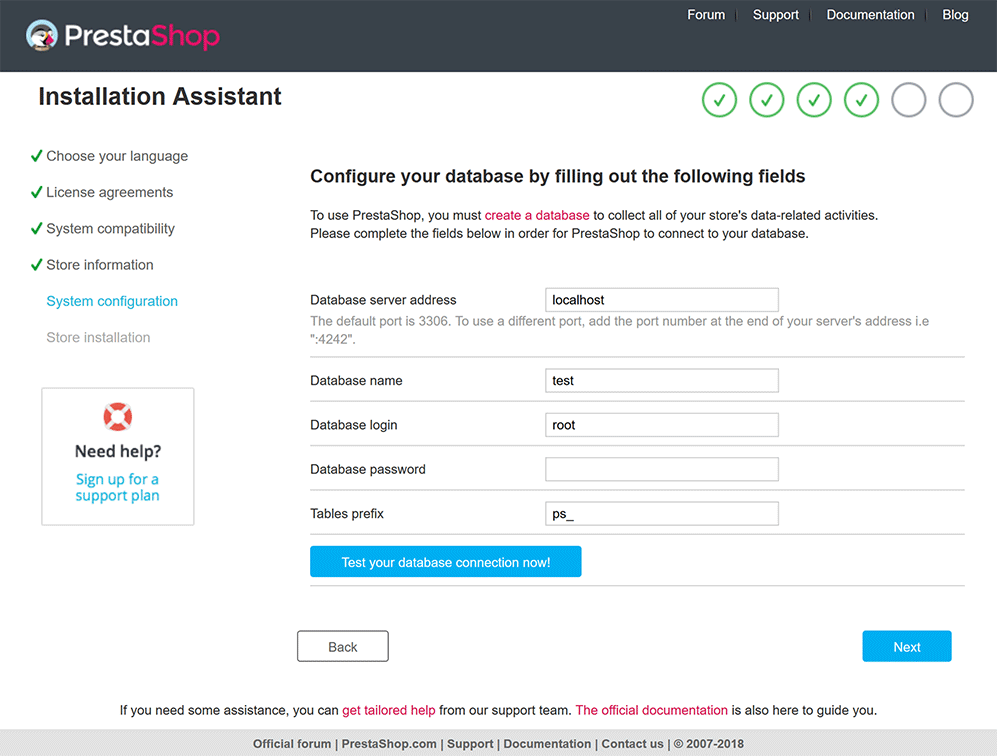
Configuring the database
In the System configuration step of the installer (see Figure 6), enter the server address (usually localhost), name of the database where PrestaShop will be installed, login and password of a user who has access to the database and a unique table prefix if another version of PrestaShop has already been installed in the database. If no MySQL database exists yet, learn how to create a database here.
Click the Test your database now! button to check the database details are correct. If they are correct, click the Next button to continue to the next step.
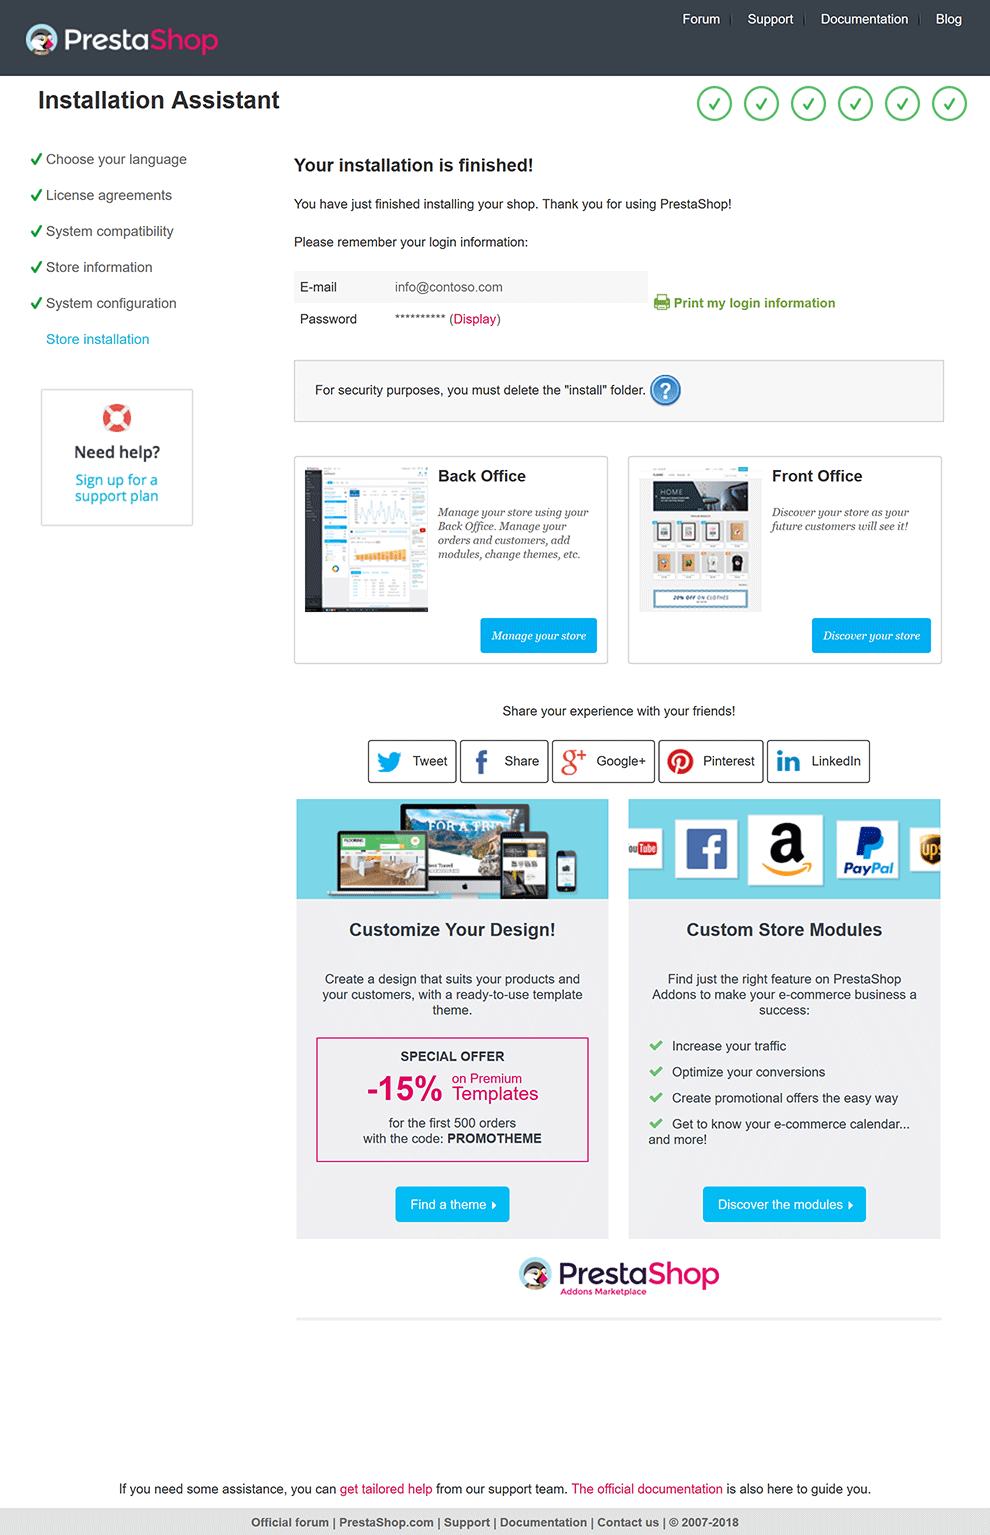
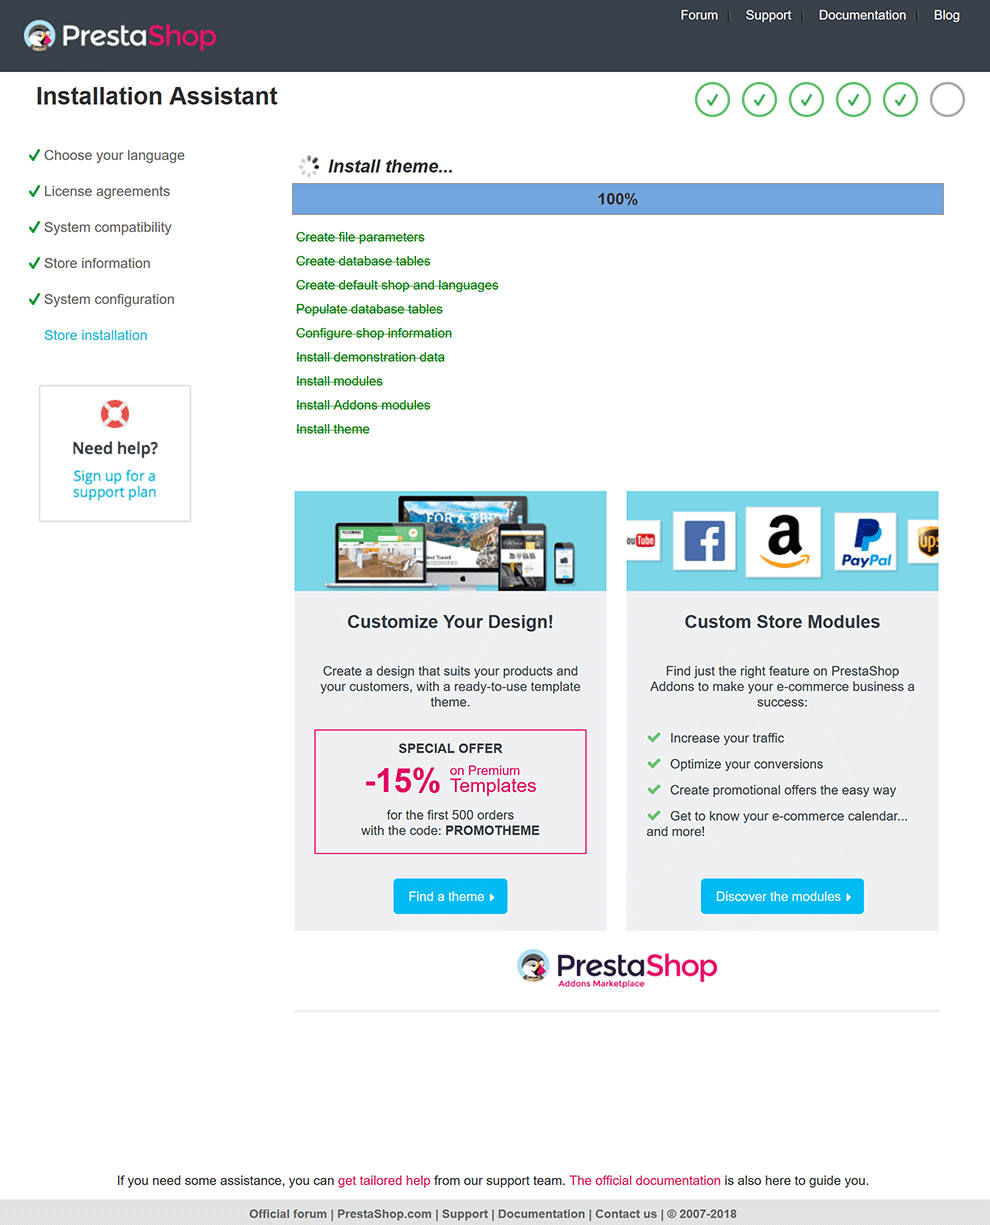
Finishing the installation
After entering all the installation information, the PrestaShop Installer will begin installation and display a progress bar (see Figure 7). Each installation step is listed as it is completed. The PrestaShop Installer will also display ads for modules and themes at the bottom of the page.
After installation completes, your administrator account information is displayed (see Figure 8). By default, the password is hidden. Click the Display link to reveal your password. There is also a Print my login information link to print your administrator account email and password.
There is warning message displayed below your administrator account information that reminds you to delete the install folder for security purposes. Below the warning message, there are links to view the PrestaShop Back Office and Front Office.
After clicking the Back Office link, notice that the PrestaShop Installer has added three random numbers and six random letters after the admin folder name. This is to make it harder for hackers to find the administration panel. Make a note of the admin folder name or rename it to something unique but memorable.
You have now finished installing PrestaShop v1.7 and can log in to the Back Office and start configuring it! Learn more about the Back Office here and the Front Office here.